Shoot The Dog!
- Thread starter snowbunny
- Start date
Emily_Babbelhund
Mama Red HOT Pepper
- Location
- Regensburg, Germany
Yes!Am I being a bit dim here... is there a separate facebook group for "Shoot the Dog?"
Bei Facebook anmelden
Melde dich bei Facebook an, um dich mit deinen Freunden, deiner Familie und Personen, die du kennst, zu verbinden und Inhalte zu teilen.
 www.facebook.com
Emily_Babbelhund
Mama Red HOT Pepper
- Location
- Regensburg, Germany
- Location
- Andorra and Spain
Sorry Kate I thought I’d posted it already!! Come join us!!
- Location
- Andorra and Spain
If you’ve already read through it once and watched the videos, skip straight to the lab. You don’t have to understand it all immediately, the important thing is getting out there with your camera and seeing how the settings affect what happens to the photo. You can go back afterwards and read the lectures at your leisure, and once you have more practical experience, the words will make more sense. There is no examSo... I will tell my brain to shut up and read the lessons again today and attempt a lab. Not a Lab, but a lab.
The CliffNotes are:
1. The aperture of the lens works like the pupil of your eye, letting in more light when it’s bigger and less when it’s smaller.
2. When the aperture is wider, there is less depth to what is in focus (ie if your dog is standing looking at you then at a narrow aperture you may have the whole dog in focus, tip to tail, but with a wide aperture the eyes may be in focus but the nose, ears, and everything else is blurry)... this is the point that needs the practical work to internalise it.
3. The bit that people (including me when I started out) can get muddled over is that as the “number” gets bigger, the aperture itself (the hole) gets smaller. So f/1.4 is wiiiiide open, like a cat who just saw a cucumber, and f/22 is teeny tiny, like someone staring into the sun. Again, it’s confounding to start with but just write it down if you need to and then the more you use it, the more this becomes second nature and you won’t even need to think about it.
Beanwood
Administrator
OK.. just worked it out! Jeezuuuuussss!I have used my camera for the first lab. Just having a wee problem with the single point on my new second hand camera! Everything else seems to make sense though.
Jacqui-S
Moderator
- Location
- Fife, Scotland
Is that good......or bad......?OK.. just worked it out! Jeezuuuuussss!
Beanwood
Administrator
Emily_Babbelhund
Mama Red HOT Pepper
- Location
- Regensburg, Germany
- Location
- Andorra and Spain
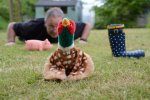
LOL love the photobomb! If you post your labs up in the FB group instead of here, your classmates will benefit from it, and you may get some feedback/follow-up/questions etc 
- Location
- Fife, Scotland
Emily_Babbelhund
Mama Red HOT Pepper
- Location
- Regensburg, Germany
Ugh, I'm already feeling like I'm sinking too far behind. I've just not got beyond my initial reading of the first lectures. @snowbunny would it look weird at this point to post things from the first lab on FB?
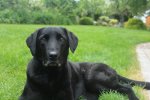
@Sophiedoodle love the photo of Lilly. Her eyes are marvellous.
@Sophiedoodle love the photo of Lilly. Her eyes are marvellous.
- Location
- Andorra and Spain
Absolutely not! There is no "behind". Especially for the bronze level - at gold, the class ends after six weeks, and they lose access to Amy then. You got us people in the FB group for as long as you want uswould it look weird at this point to post things from the first lab on FB?
Anyway, someone else just posted the first lab yesterday. So more than is being just "OK", by doing so, you might be encouraging other people who are feeling "behind" to post, rather than abandoning all hope!
- Location
- Fife, Scotland


